Facebook Business Manager Can Make Your Life Easier
March 16, 2020
 Do you remember the old days of having to set up separate admins for Facebook business pages if you didn’t want to use your personal information to avoid giving page managers access to your personal Facebook page as well? I do. Wow, did that ever get confusing. Facebook has addressed this problem along with others by creating Facebook Business Manager. Agreed, in the beginning, there were a few kinks to work out with the new business manager concept, but that is all fixed now and there really isn’t anything that should be holding you back from utilizing this FREE tool offered by Facebook.
 What is Facebook Business Manager? Facebook describes it like this, “Business Manager serves as a one-stop-shop to manage business tools, business assets and employee access to these assets.” To break it down, it’s the place to manage all your Facebook marketing and advertising activities. Another beautiful thing about this feature is that you can control multiple, yes multiple, users’ access to additional resources like your Instagram account and product catalogs. Your business activities are finally separate from your personal profile, so no more posting from the wrong place. I have done this so many times when trying to interact with clients on my business page and end up doing it under my personal profile. So frustrating! There is just one caveat; you must be the one to set it up unless you are willing to give someone else your Facebook login. Personally, I’m not really down with giving out my Facebook login info to anyone else, so all you need to do is follow these simple steps to be well on your way to making your life a whole lot easier when it comes to managing your Facebook business page:
- You will need to use your personal Facebook profile in order to confirm your identity, don’t worry, no one will have access to your personal information in that account. NOTE: If you have an existing Facebook business page that you are adding, you must be the administrator for the following steps.
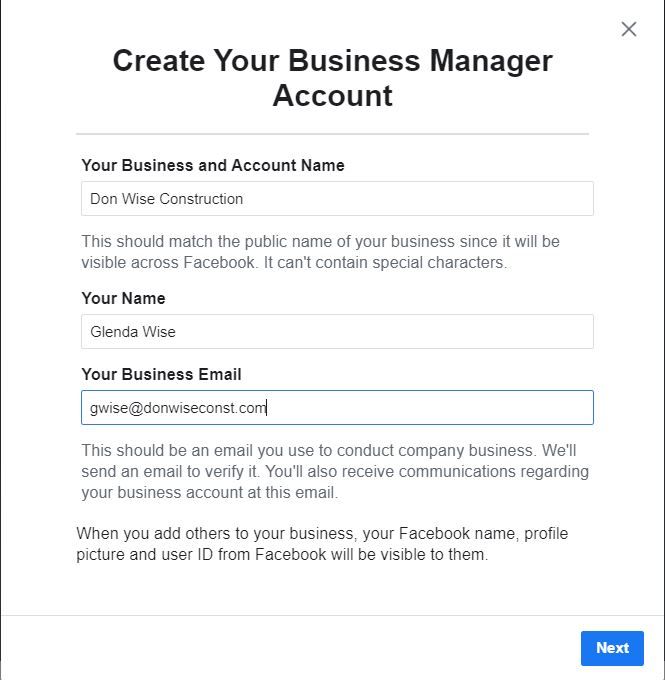
- Next, go to Facebook.com and click CREATE ACCOUNT in the top right corner.
- Enter your business name, your name and the business email address that will be used to manage your Facebook Business Manager account, then click
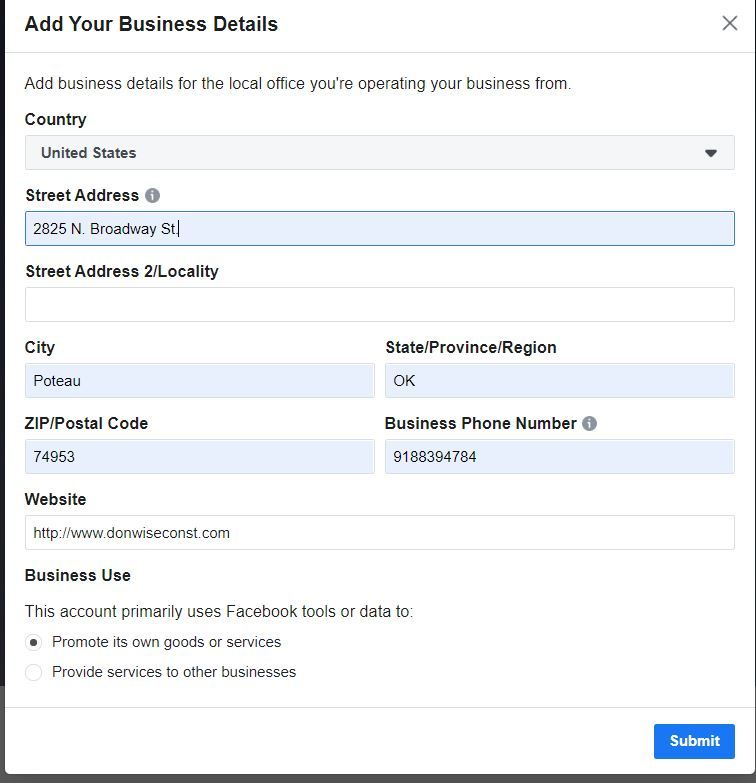
- Then you will be prompted to enter your business details: address, phone number, and website. At this point, you will need to specify whether you’ll use the Business Manager account to promote your own business or to provide services to other businesses. After you are finished, click SUBMIT.
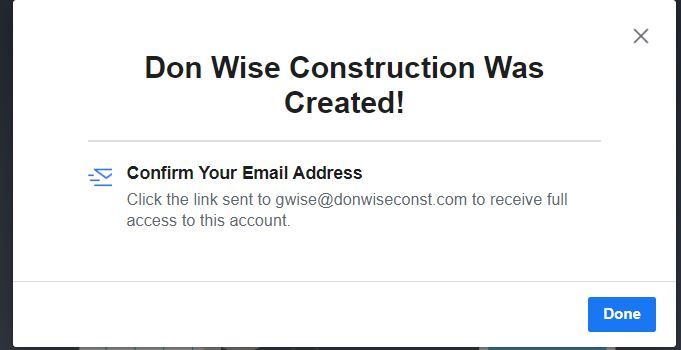
- Facebook will send you an email message asking you to confirm your business email.
- After confirmation, you can either add an existing Facebook business page or create a new one. Note: For companies such as Cyberspyder Marketing Services that manage Facebook pages for clients, you will need to give them access to your account or you can allow them to request access to your account.
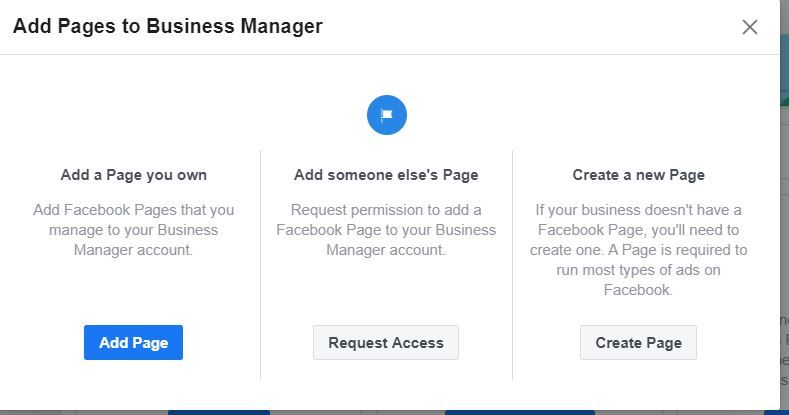
- To add your Facebook page to Facebook Business Manager:
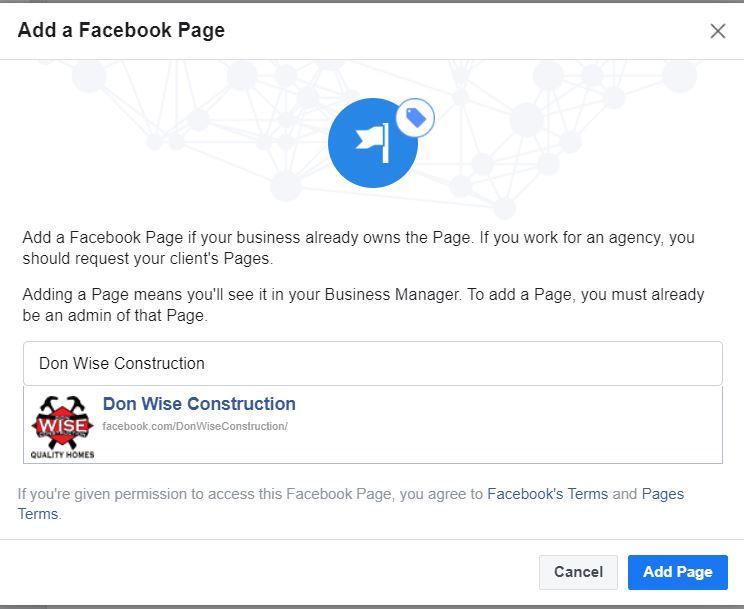
- From the Business Manager dashboard, click ADD PAGE. A pop-up box will appear and you will need to click ADD PAGE Then, start typing your Facebook business page name in the text box to find your business so you can just click on it. The click ADD PAGE.
- If you have more than one Facebook page associated with your business, add the remaining pages by following the steps above.
- For Facebook ad account owned by you, do the same steps as above, except you are linking Facebook ads rather than business pages. Note: Once you add your ad account to Facebook Business Manager, you can’t remove it.
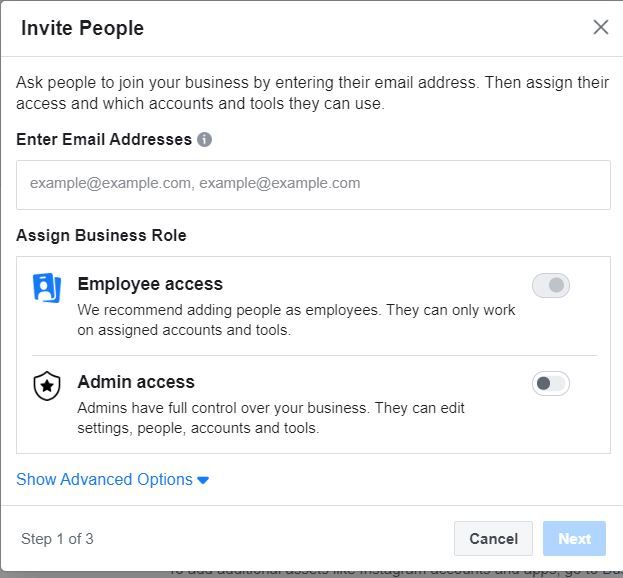
- Finally, this is where you can add people to help you manage your Facebook assets.
- From the business Manager dashboard, click ADD PEOPLE.
- In the pop-up box, enter the business email address of the team member you want to add. You will have the option to give these individuals limited account access (Employee Access) or full access (Admin Access). Add people using their work email addresses, Click NEXT.
- The next menu page, click PAGES choosing which pages you want each team member to work or. If you have more than one ad account, do the same for each.
- Each team member added will receive an email with information regarding access you’ve given them and a link to get started.
- No worries if you no longer employ someone you’ve given previous access, you can easily remove that individual.
 Go ahead and get your business page switched to Facebook Business Manager and then allow Cyberspyder Marketing Services to manage it for you to. We do the hard part, freeing you up to run your business. If history with Facebook tells us anything at all, at some point they will make all businesses switch to this format in order to advertise. In fact, that’s what some people “in the know” are already predicting. Get ahead of the game and switch your account today.
Marketing That Grows Your Business
©2000 - CyberSpyder Marketing Services

